Date: 2026.08.29 Click: 6
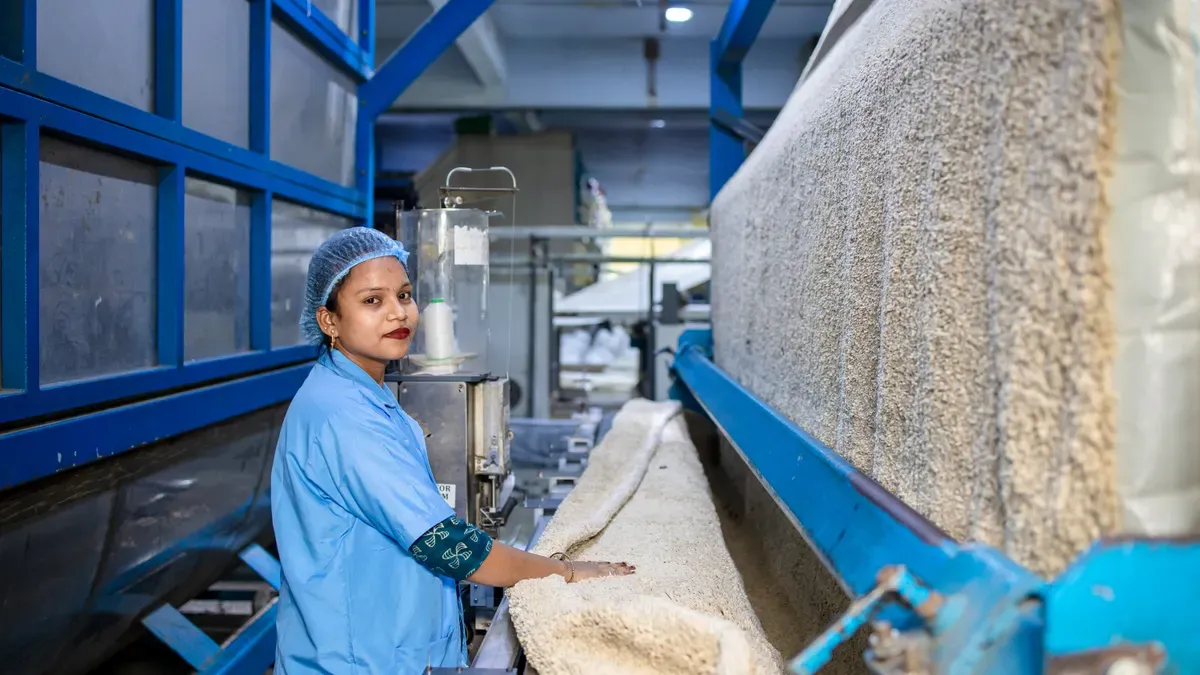
Using a non woven bag making machine, you start by feeding polypropylene pellets into an extruder. This machine melts the plastic and creates a steady sheet of fabric. Then, a cutting unit within the machine turns the fabric into bag shapes. A printing press adds your custom designs. Finally, sewing or ultrasonic welding tools, integrated into the non woven bag making machine, put the bags together and add handles. The whole process is smooth and easy to scale up. You can adjust it to handle large orders efficiently. Understanding each step of the non woven bag making machine helps you improve your workflow. The next sections explain every step, from raw material to final bag.
Key TakeawaysBegin with polypropylene pellets, melt them in an extruder, and shape them into a steady sheet of fabric.
Use a cutting machine to shape the fabric into exact bag pieces, then add your own designs with flexographic or rotogravure printing.
Put the bags together by sewing or ultrasonic welding, which makes strong handles and seams without thread.
Use machines to fold and stack bags automatically, so the work stays steady and needs less human effort.
Use quality checks and energy-saving tools like variable-frequency drives to cut costs and make bags last longer.
Polypropylene (PP) granules serve as the foundation for every non-woven bag you produce. These small plastic pellets arrive at your facility in bulk sacks or silos. You feed them directly into the production line without any pre-processing. The quality of these granules determines the strength, texture, and durability of your final product.
You must also incorporate additives into the polymer mix. UV stabilizers protect the bags from sunlight damage during outdoor use. Without them, the fabric becomes brittle and fades quickly. Colorants give your bags their visual appeal. You can choose masterbatch pigments that match your brand colors exactly. Some manufacturers add flame retardants or antistatic agents for specialized applications. You should discuss your specific requirements with your raw material supplier to select the right additive package.
Your production line requires several distinct machines working together. The extruder melts the polypropylene granules and forms them into continuous filaments. A calendar press bonds these filaments into a cohesive fabric sheet. The cutting machine then shapes the fabric into bag blanks according to your specifications. A printing press applies your custom designs when needed. Finally, sewing machines or ultrasonic welding equipment assemble the bags and attach handles.
Modern bag making machines integrate many of these functions into a single automated system. You can find complete production lines that handle everything from fabric formation to finished bag output. These integrated systems offer impressive efficiency. A typical automatic line produces between 40 and 120 pieces per minute, depending on bag size and complexity. This speed allows you to fulfill large orders quickly while maintaining consistent quality.
You should evaluate your production goals before selecting equipment. Small operations might start with individual machines and expand later. Larger manufacturers benefit from fully integrated lines that minimize material handling between stages. Your choice of machinery directly impacts your production capacity, labor requirements, and overall operating costs.
Fabric Production via Extrusion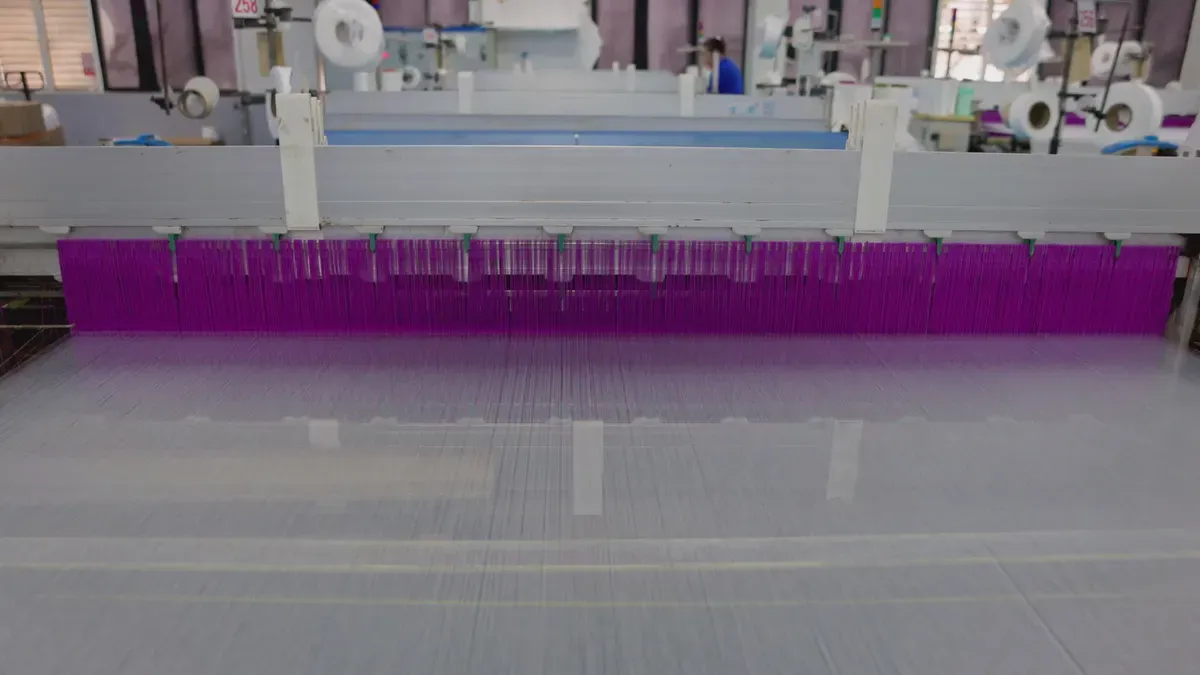
The extrusion process starts when you put PP granules into the extruder's hopper. Inside the machine, a rotating screw pushes the pellets through a heated barrel. The temperature rises steadily as the material moves forward. You must keep the heat in the right range for good output. General non-woven extrusion works best between 180°C and 240°C. This range keeps the polymer fluid enough to flow smoothly without breaking down.
|
Process |
Optimal Temperature Range |
|---|---|
|
General PP non-woven extrusion (sheet, film, fabric) |
180°C – 240°C |
|
Melt-blown PP fabric extrusion (fine fiber formation) |
220°C – 240°C |
The molten polymer exits through a spinneret, which has hundreds of tiny holes. These holes form continuous filaments that cool as they leave the die. The screw speed and the air temperature around the filaments affect fiber thickness. You can adjust these settings to make finer or coarser fabric. Melt-blown production needs tighter temperature control. That process runs at 220°C – 240°C to create the ultra-fine fibers used in filtration products. For standard bag fabric, the lower range works well and saves energy.
Freshly extruded filaments land on a moving conveyor belt. They form a loose web that lacks strength at this stage. The web then passes through a calendar press. This machine uses heated rollers to apply pressure and bond the fibers together. The heat partially melts the filament surfaces, fusing them at their contact points. The result is a cohesive sheet with consistent thickness and tensile strength.
You control the fabric's final properties through roller temperature and pressure settings. Higher pressure creates denser, stronger material. Lower pressure produces softer, more breathable fabric. After bonding, the sheet moves through cooling rollers to set its structure. The finished fabric then winds onto large rolls for storage. These rolls feed directly into the cutting stage of your production process. Each roll holds hundreds of meters of material, allowing uninterrupted operation. You should inspect the roll edges during winding to catch any misalignment early. Proper winding prevents wrinkles and tension problems later. This careful handling ensures the fabric remains flat and uniform for the next step. The quality of this base material directly affects the durability of your finished non-woven bags. A consistent sheet makes cutting and assembly easier downstream.
Cutting and Shaping with the Non Woven Bag Making Machine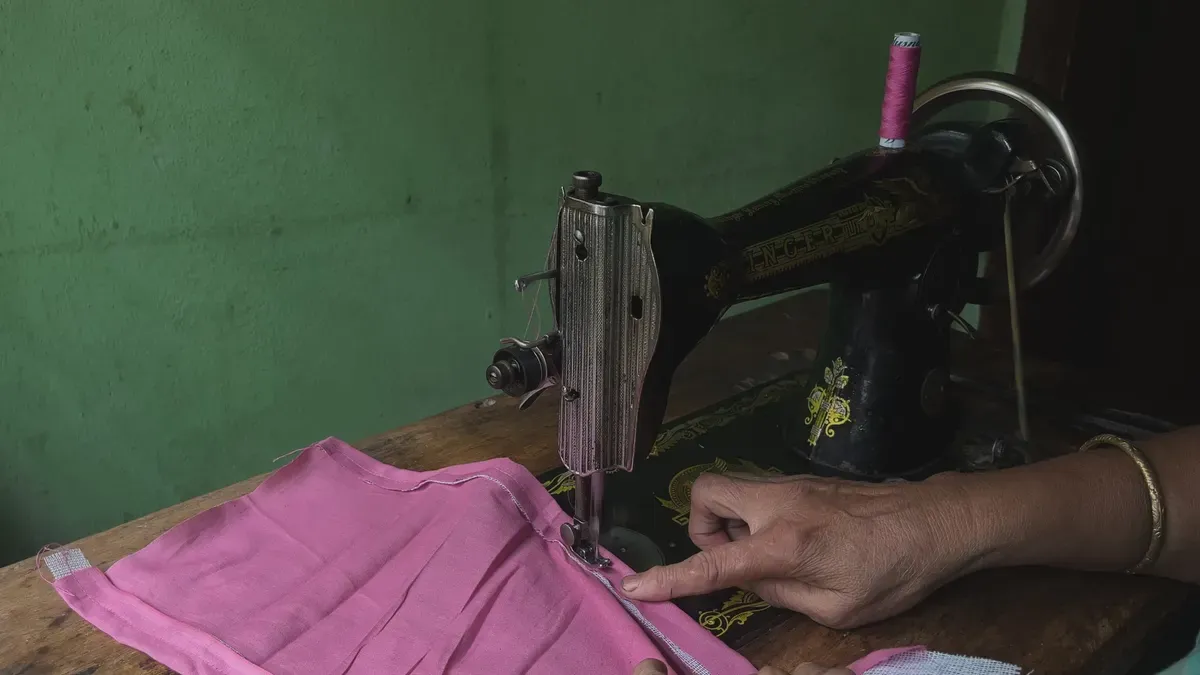
You set the bag size on the control panel. You type in the width, length, and side-fold size. Each bag style needs its own settings. The table below shows common sizes for two machine models.
|
Machine Model |
Finished Product |
Bag Width (mm) |
Bag Length (mm) |
Side-folding Size (mm) |
Box Bottom Side & Bottom Gusset (mm) |
|---|---|---|---|---|---|
|
YG-600 |
D cutting bag |
100-700 |
250-580 |
- |
- |
|
YG-600 |
T-shirt bag |
200-450 |
100-800 |
50-100 |
- |
|
YG-600 |
Box bottom bag |
100-700 |
200-580 |
- |
50-75 |
|
YG-700 |
D cutting bag |
100-800 |
250-690 |
- |
- |
|
YG-700 |
T-shirt bag |
200-450 |
100-800 |
50-100 |
- |
|
YG-700 |
Box bottom bag |
100-800 |
200-690 |
- |
50-75 |
One machine can make D cutting, T-shirt, and box bottom bags. You just change the settings. This lets you take many different orders without new equipment.
After setting sizes, you put the fabric roll on the unwinding rack. The automatic feeder pulls the material in. A tension system keeps the fabric flat and steady. This stops sagging or stretching. Good tension is key for clean cuts. If the fabric is too loose, cuts become uneven. If it is too tight, the material may tear.
The rocker arm tension system checks the pull from the fabric as the machine runs. It changes the unwinding speed right away. This keeps the tension steady. The automatic CNC oscillating knife cutting machine uses tension rollers. These rollers sit between the rack and the crawler. They sense the tightness and start unwinding as needed. This keeps the fabric flat on the cutting table.
There are several tension control methods for bag machines. These include:
Torque and speed controlled feeders
Surface and center driven feeders
Mechanical, pneumatic, or loadcell dancer-based tension systems
Once the fabric enters the cutting area, the machine starts shaping. The cutting unit uses automated precision to make bag blanks. Laser cutting ensures each piece matches your set sizes. Every bag shape comes out the same. This consistency matters for later assembly. The cutting step removes the need for manual trimming. You get clean, ready-to-assemble pieces every time.
The cutting runs fast. The machine can make hundreds of pieces per minute. You do not need to adjust it between cuts. The automated system handles everything. This is where the machine shows its real value. The mix of feeding, tension control, and cutting in one system speeds up production.
The cutting method depends on your machine type. Some use oscillating knives. Others use laser or ultrasonic cutters. All give clean edges. The choice depends on your bag design and material thickness. Thicker materials need more power. Thinner ones need precise control. Laser cutting works well for detailed shapes. It also seals edges slightly to stop fraying. This makes your bags last longer.
After cutting, the blanks move to the next step. The machine stacks them automatically. This gets them ready for printing or assembly. You can adjust the stack size. The whole cutting and shaping stage needs little operator input. This lets you focus on quality checks. The precision here affects the final product. Accurate cuts make assembly easier. They also cut down waste. You can make steady non woven bags that meet client needs.
Printing and CustomizationAfter cutting, some fabric pieces move to the printing stage. You add custom designs to your non-woven bags at this point. The non woven bag making machine integrates a printing unit that applies your logo or artwork. This step adds value to your products. Custom printing makes your bags stand out in the market.
You have two main printing methods to choose from. Flexographic printing uses flexible rubber plates. These plates transfer ink directly onto the fabric. This method works well for simpler designs. It also offers fast setup times. You can change designs quickly between orders.
Rotogravure printing uses engraved metal cylinders. Each cylinder carries the image in tiny cells. The process delivers sharper detail and more consistent color. It works best for large orders with complex artwork. The higher initial cost of cylinder engraving pays off with volume.
Your printing speed depends on the machine tier.
|
Machine Tier |
Typical Printing Speed (meters/minute) |
|---|---|
|
Entry-level |
30–60 |
|
Mid-range |
60–120 |
|
High-end |
Up to 200 or higher |
An entry-level flexographic press runs at 30 to 60 meters per minute. A mid-range machine reaches 60 to 120 meters per minute. High-end systems push up to 200 meters per minute or higher. You should match the speed to your production volume. Slower speeds give more control for detailed work. Faster speeds maximize output for simple designs.
Ink selection directly affects your print quality and bag durability. Water-based inks often cause problems on non-woven polypropylene fabric. These inks absorb unevenly into the fibers. Colors can bleed or look washed out over time. Your designs lose their crisp appearance after repeated use.
Water-based inks also struggle to bond with synthetic fibers. Polypropylene, polyethylene, and polyester all resist absorption. Prints fade quickly and lose sharpness.
For best results, opt for inks specially engineered for these fabrics, such as plastisol or other durable alternatives. These options provide stronger adhesion, bolder colors, and better wear resistance, ensuring your branded bags look great for the long haul.
The drying process matters just as much as the ink itself. After printing, the fabric passes through a drying tunnel. Heated air removes the solvent or water from the ink. Proper drying prevents smudging during assembly. It also locks the color into the fabric fibers. You must set the temperature and dwell time correctly. Too little heat leaves the ink wet. Too much heat can damage the fabric. Match your drying parameters to the ink type for best results. A well-tuned drying step ensures your custom bags stay vibrant through their entire life.
Assembly and Handle AttachmentAfter printing, the cut fabric pieces go to the assembly phase. This stage turns flat blanks into finished bags. The non woven bag making machine does all this work on its own. You feed the roll material into the machine, and it does a series of steps. The machine uses computer control for automatic positioning, edge correction, punching, and hot handle processes. Here is the order of operations:
Roll material feeds into the machine.
Folding shapes the fabric into the bag form.
Threading gets the material ready for assembly.
Heat sealing bonds the first seams.
Half folding makes the bag structure.
Handle parts are inserted.
Positioning moves parts for correct placement.
Punching makes holes for handles if needed.
A second heat sealing step locks everything together.
Cutting separates the finished bag.
The machine collects the finished product.
This automated process removes the need for manual work. You get the same results with every bag. The machine adjusts itself to keep alignment and quality. Now you need to pick how to attach the handles.
Sewing is still a trusted way to put non woven bags together. You can use different stitch types based on the bag design and how strong it needs to be. Each stitch has a specific use.
|
Stitch Type |
Recommended Use for Durability |
|---|---|
|
Lock stitch |
Strong seams at handles and bottoms |
|
Overlock stitch |
Stops fraying, especially on woven fabrics |
|
Bartack stitch |
Adds strength at stress points like strap connections |
|
Topstitch |
Gives a finished look and holds seams together for longer bag life |
The lock stitch makes the main seams that hold the bag together. You use it for the bottom seam and the side seams. The overlock stitch works well on edges to stop fraying over time. The bartack stitch gives extra strength at stress points where handles connect to the bag body. The topstitch adds a finished look and strengthens the folded edges.
Sewing machines for non-woven bag production run at high speeds. They can stitch through many layers of fabric without trouble. You need to match the thread type to the fabric weight. Polyester thread works well for most bag uses. It resists UV damage and lasts under repeated use.
Ultrasonic welding is a modern choice instead of sewing. This method uses high-frequency sound waves to bond the fabric together. The machine turns electrical energy into mechanical vibrations. These vibrations create heat where two fabric layers meet. The heat melts the polypropylene fibers together. The result is a strong, clean bond without any thread.
The technology uses less energy and creates little waste. This matches eco-friendly bag making goals.
This makes ultrasonic welding good for companies focused on being green. You avoid thread waste and use less energy than sewing. The welded seams also resist water and dirt better than stitched seams. There are no needle holes for moisture to get in.
The non woven bag making machine can add ultrasonic welding for handle attachment. The process works fast and gives the same results each time. You can weld handles directly onto the bag body without poking holes in the fabric. This creates a smooth inside surface in the bag. Many customers like this cleaner look for branded non-woven bags.
Welding also allows for faster production speeds. You do not need to stop for thread changes or needle adjustments. The machine keeps the same output rate for the whole run. The main trade-off is the upfront cost of equipment. Ultrasonic welding modules add to the machine price. But the savings in labor and thread often make up for that cost over time.
You should think about your production volume when picking between sewing and welding. Low-volume runs may work better with the flexibility of sewing. High-volume orders get the most from ultrasonic welding speed and consistency. Many makers use both methods on the same bag. They sew the main seams and weld the handles for the best strength.
Finishing and Quality Control for Non Woven BagsThe last step in assembly makes a flat, finished bag. You need to fold and stack these bags neatly for packing and shipping. Folding by hand slows your line and gives uneven results. Automated systems fix this problem completely.
Modern folding machines do the whole job without someone running them. The VarioFold machine folds and stacks up to 12 bags per minute. It folds each bag exactly and puts it into a box. This speed keeps your production line moving without stops. You avoid delays at the end of your process.
The folding machine takes bags right from the assembly area. It uses guides to make clean, even folds. Every bag comes out the same size and shape. This consistency makes packing and shipping easier. Your customers get a professional, uniform product every time.
Automated stacking also keeps your bags from getting damaged. The machine puts each bag gently onto the stack. You avoid the scuffs and creases that happen when people handle them. The stacked bags stay clean and ready for the next step. You can set the machine to count bags and tell you when a stack reaches your target quantity.
Quality control protects your good name and cuts waste. You must check every batch of non-woven bags before shipping. A visual check finds obvious problems like misaligned prints or rough edges. You train your staff to spot these issues quickly. They take out bad pieces from the line right away.
Strength testing looks deeper than a visual check. You need to make sure your bags can handle real use. A simple pull test checks the seams and handle parts. You pull on the handle and watch for it to come apart. The fabric itself should stretch a little before tearing. This tells you the material is bonded well.
You should test bags from each run. Random sampling gives you a true picture of overall quality. Set aside a few bags from each batch for testing. Write down the results to track your performance over time. Consistent results show your process is stable. Sudden failures point to a problem with raw materials or machine settings.
Industry standards guide your testing steps. You can follow general packaging standards for seam strength and fabric weight. Your raw material supplier can also give you reference values. Compare your test results to these benchmarks. This way, your non-woven bags meet what customers expect for durability and performance.
Scaling Production with AutomationRobotic arms change your production line by doing repetitive jobs. These machines lift, move, and stack non-woven bags without getting tired. They work nonstop through all shifts. Your workers can then focus on quality checks and watching the machines. Smart sensors add more intelligence. They watch temperature, tension, and speed as things run. The system warns you when settings move away from the best range. You spot issues before they make bad bags.
The cost to add these systems pays off fast. A robotic stacking arm replaces several manual workers. It works quicker and never takes breaks. Your line runs longer without pauses. Smart sensors also track energy use. You find machines that use too much power. Small changes lower your utility bills. The whole production process becomes easier to predict. You can plan output with confidence.
Lean manufacturing is about removing waste. You measure every part of your work. Overall Equipment Effectiveness (OEE) gives you a full view. This number combines three parts: availability, performance, and quality.
|
Component |
Formula |
Description |
|---|---|---|
|
Availability |
Run Time / Planned Productive Time |
Shows how much scheduled time equipment actually runs. |
|
Performance |
(Ideal Cycle Time × Total Count) / Run Time |
Shows how fast operations run compared to the ideal time. |
|
Quality |
Good Count / Total Count |
Shows the share of products without defects. |
|
OEE |
Availability × Performance × Quality |
Overall Equipment Effectiveness, a key measure of manufacturing efficiency. |
You calculate OEE to find weak spots in your line. A low availability score means machines sit idle too long. A poor quality score points to material or calibration problems. You fix each issue directly.
Real gains come from using these ideas. One factory cut transportation time per batch from 588 seconds to 406 seconds. That is a 30.95% drop. Daily output rose from 324 to 351 units. Yearly production went up by 8,424 units. These gains came from rearranging workflows and cutting movement between stations.
Just-in-time production keeps your inventory lean. You order raw materials only when needed. This lowers storage costs and stops material from breaking down. You also recycle scrap fabric back into production. Every piece of polypropylene adds to your output. This method makes your non-woven bag operation more sustainable and profitable.
Overcoming Common Manufacturing ChallengesYou always need to cut waste and lower energy costs. Material waste directly hurts your profits. Every piece of non-woven polypropylene that misses the cutting table is lost money. You can recycle these scraps back into production. Many makers collect trim waste and run it through a granulator. The resulting pellets mix with new material at a set ratio. This practice lowers raw material costs and keeps waste out of landfills.
Energy use also needs your focus. Extruders and auxiliary motors draw a lot of power during production. Variable-frequency drives (VFDs) offer a proven fix. These devices let motor speed match real-time production demand. Per fan-affinity laws, lowering motor speed by 20% cuts power use by about 50% for fan-type loads. VFDs on the extruder screw drive save up to 30% energy during ramp-up or grade changes. A 2023 plant audit showed retrofitting three motors with VFDs saved 48,000 kWh yearly, about $6,000 at U.S. industrial rates. The payback period of 8 to 14 months makes this investment attractive for most facilities.
Quality consistency starts with a disciplined calibration schedule. You must calibrate sealing temperature and photoelectric tracking daily. These two factors directly affect your final product quality. A misaligned sensor causes bags to shift during cutting. Weak seals fail during customer use. You cannot afford these defects.
You should also test calibration settings weekly. This frequency verifies that cutting and sealing mechanisms stay aligned correctly. Weekly checks prevent uneven edges or weak seals that compromise bag durability. Additionally, recalibrate photoelectric sensor sensitivity monthly. Accurate tracking ensures consistent bag dimensions across your entire production run.
Staff training completes your quality system. Operators who understand the calibration process catch problems early. You train them to recognize warning signs before defects appear. Document every calibration event. Track trends over time. A sudden change in calibration frequency points to a worn component or a material issue. Address these problems quickly to maintain steady output of high-quality non-woven bags.
Your journey starts with polypropylene granules and ends with finished non woven bags. The entire process relies on every machine. The extruder creates the fabric. The cutting unit shapes each piece. The printing press adds your branding. The assembly line seals and attaches handles. Quality control ensures every bag meets standards. This production process delivers durable, eco-friendly non-woven bags.
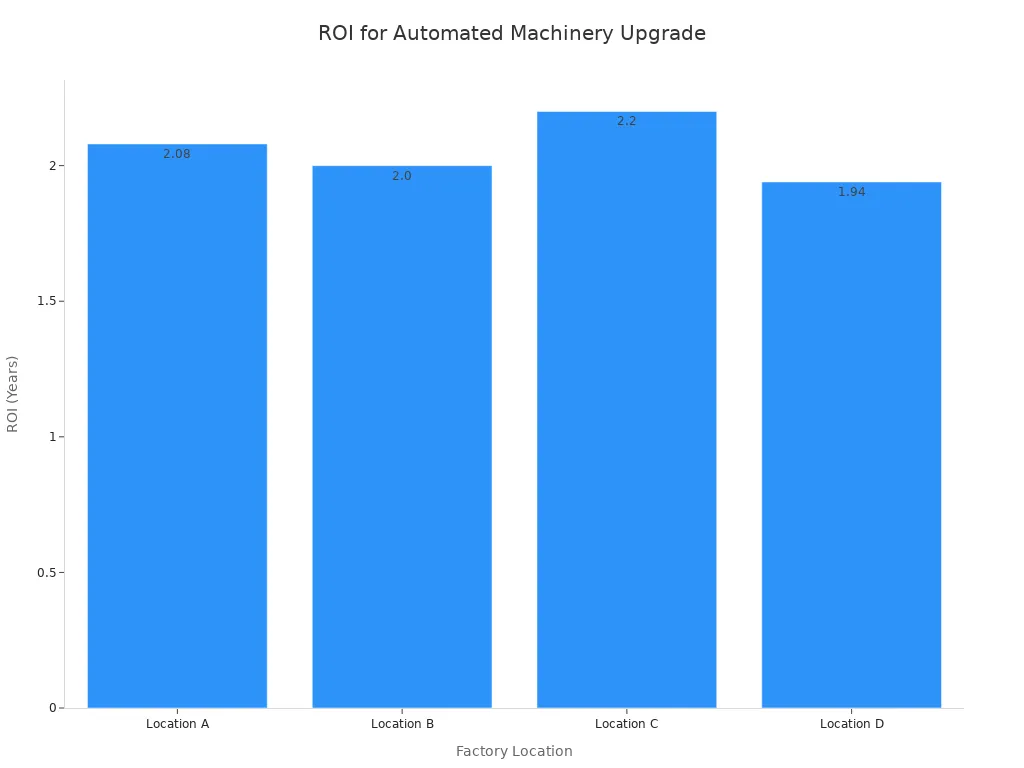
Facilities that upgrade to automated equipment see a clear return. The data shows an average ROI of 2.055 years across four factory locations.
Mastering the entire manufacturing non-woven bags cycle gives you a competitive edge. Quality control and sustainability must be core to your operation. Investing in modern machinery future-proofs your business. Consumer demand for sustainable packaging continues to grow.
FAQThe best extrusion temperature for regular PP non-woven fabric is 180°C to 240°C. This range keeps the polymer fluid enough to flow smoothly. Melt-blown production needs a higher range of 220°C to 240°C.
A typical automatic line makes 40 to 120 pieces per minute. This speed depends on bag size and complexity. Your machine type and settings also affect the final output rate.
Flexographic printing uses flexible rubber plates for simple designs with fast setup. Rotogravure printing uses engraved metal cylinders for sharper detail and consistent color. Choose based on your order volume and artwork complexity.
Installing VFDs on an extruder screw drive can save up to 30% energy during ramp-up or grade changes. A 2023 plant audit showed retrofitting three motors with VFDs saved 48,000 kWh yearly. This reduces your operating costs significantly.
"4mmx2mm Disc Magnet" from S****** received 4 quotation(s)